This article explains a practical way to design and build your own due diligence (DD) simulator on BeSavvy. The core idea is simple: start with a clear use case, break it into a small number of steps (elements), build each element as its own learning unit, and then connect them into one coherent workflow. Done well, a DD simulator trains three things junior lawyers actually need: (1) spotting issues, (2) extracting and analysing facts from documents, and (3) communicating findings clearly.
1) Start with the use case (and keep it narrow)
Before you create any content, agree on the details:
- Who it’s for: e.g., trainees / 0–2 PQE / interns
- Context: share purchase DD for a mid-market acquisition; vendor DD; financing DD; IP DD, etc.
- Inputs: what documents the learner will review (or what a data room looks like)
- Outputs: what the learner must deliver (issues list, DD report extract, email to a partner, red flag summary, call with a client)
- Success criteria: what “good” looks like (accuracy, prioritisation, clarity, commercial judgement)
Example:
“This simulation trains a junior lawyer to run a first-pass legal due diligence review for a share purchase. The learner reviews a small set of documents, identifies key legal risks (including change of control and IP issues), and produces a clear red-flag summary and an issues list for the supervising associate.”
The most common mistake is trying to cover “all of due diligence”. Instead, pick one slice and do it properly.
2) Break the simulation into 3 core elements
A due diligence workflow naturally splits into three parts:
- Understanding what to look for (knowledge acquisition)
- Document review (doing the diligence)
- Reporting (delivering the output)
Build these as separate “blocks” first. Once each block works on its own, connect them into a single end-to-end simulator.
Element A: Understanding what to look for with a Case Study
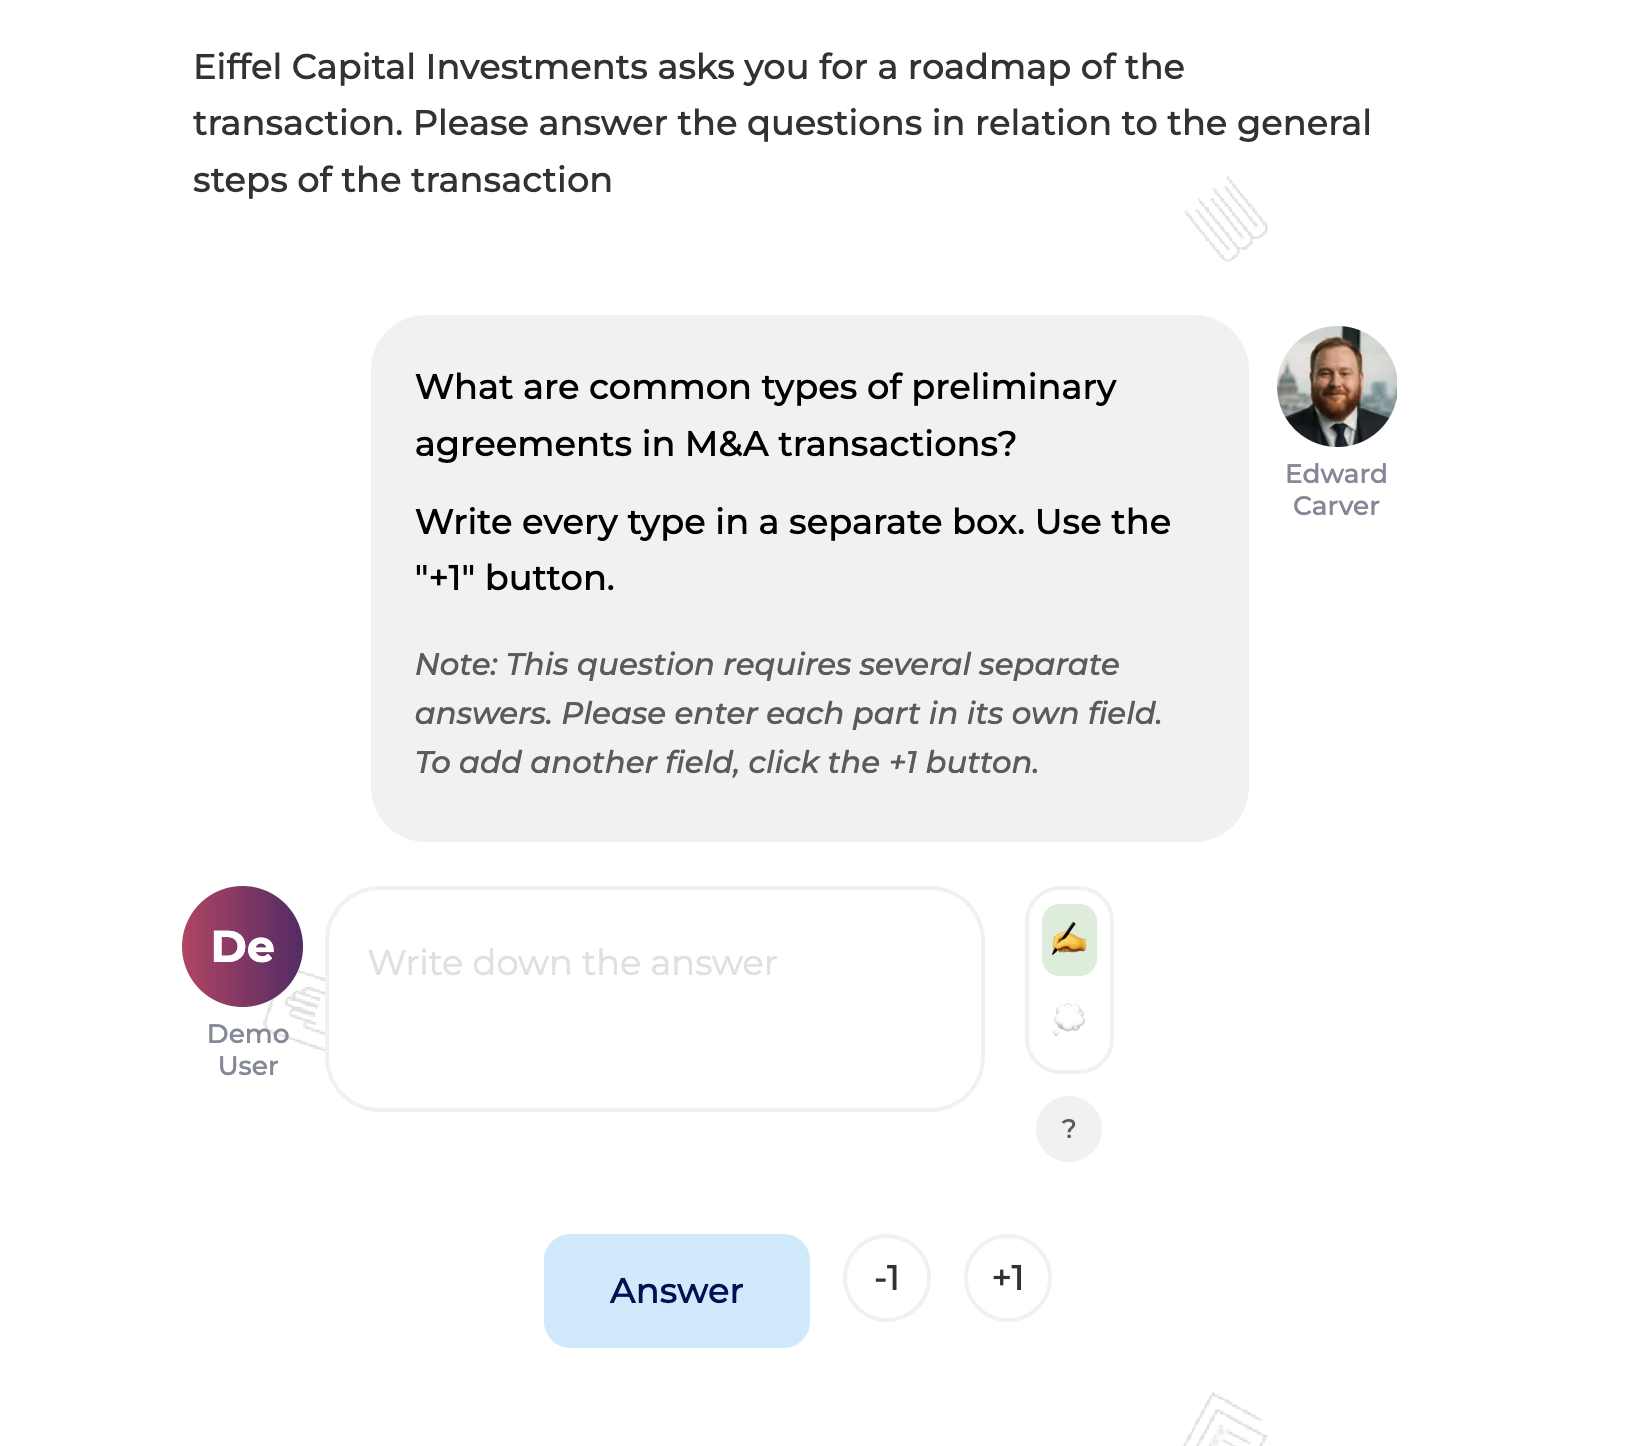
Goal: help the learner build a clear “search plan” before they dive into documents, so they know what they are looking for and why it matters.
Recommended format: a Case Study block with a mentor-style discussion that guides the learner through issue-spotting logic and prioritisation while asking guiding questions.
What to include:
1. A short scenario: business model, deal context, timeline, key parties, constraints, and any obvious pressure points.
2. A set of guiding questions. Examples:
- How do NSIA notification/approval requirements work at a high level, and what facts would you need to know to assess whether the regime is triggered?
- What is a change of control clause in practical terms, and why can it create deal execution risk? Where do you typically find it?
- If this is an IP-heavy business, what are the three key IP risks you would look for first, and why?
- What are the likely red flags vs medium-risk vs low-risk issues in this scenario, and what would move an issue up or down in severity?
Compile all this this into a Case Study block to help the users prep for the actual due diligence.
Element B: Doing the DD (two practical approaches)
Once the learner has a search plan, you train them on actual document handling. In BeSavvy, there are two strong ways to do this – choose based on the skill you want to train.
Approach 1: “Find the right documents” using the Search component
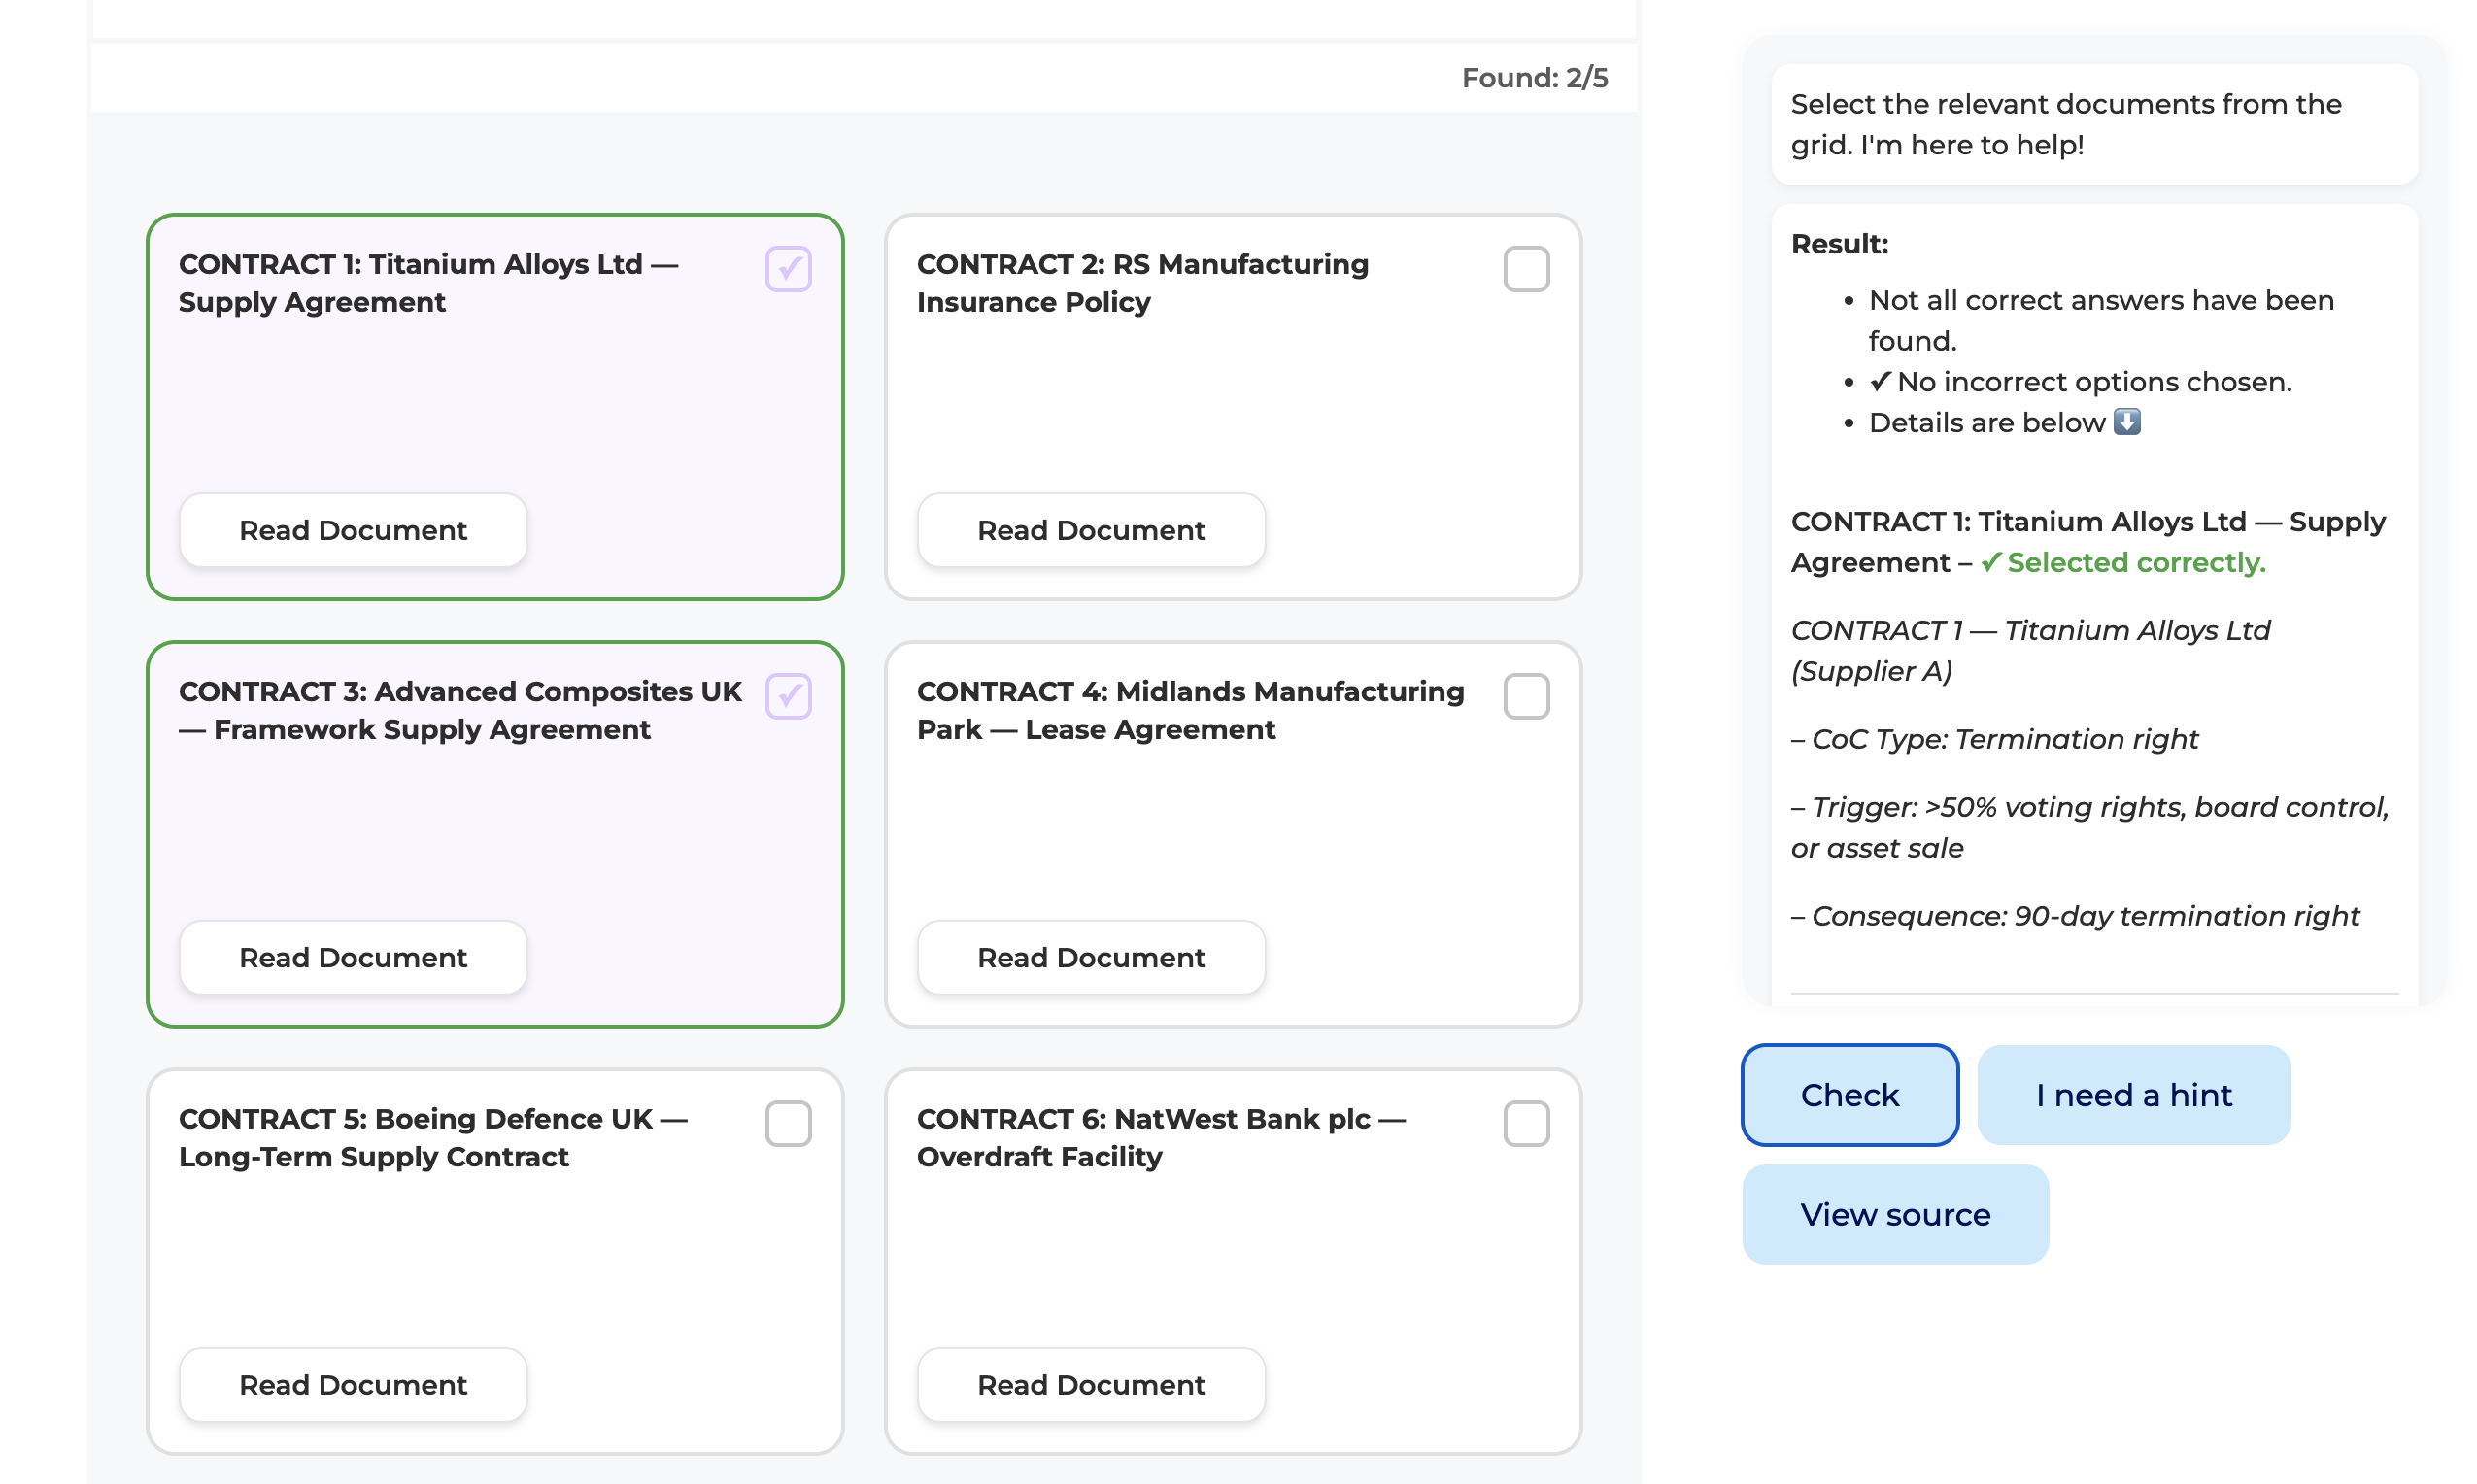
Best for: data-room navigation, triage, recognising which documents matter.
How it works
- You provide a set of documents (or document titles/excerpts).
- The learner looks through them and selects documents relevant to a given risk.
- The task focus on document selection and prioritisation, not only clause reading.
Example tasks
- “Find the documents that would confirm whether a change of control consent is required.”
- “Locate evidence of IP ownership and any licence restrictions.”
- “Identify which HR/contract documents matter for key personnel risk.”
What you’re training
- Judgement under time pressure: “What do I look at first?”
- Practical workflow: finding needles in a data room haystack
- A defensible approach: “I checked X because Y”
Approach 2: “Read and flag the clause” using the Editor function
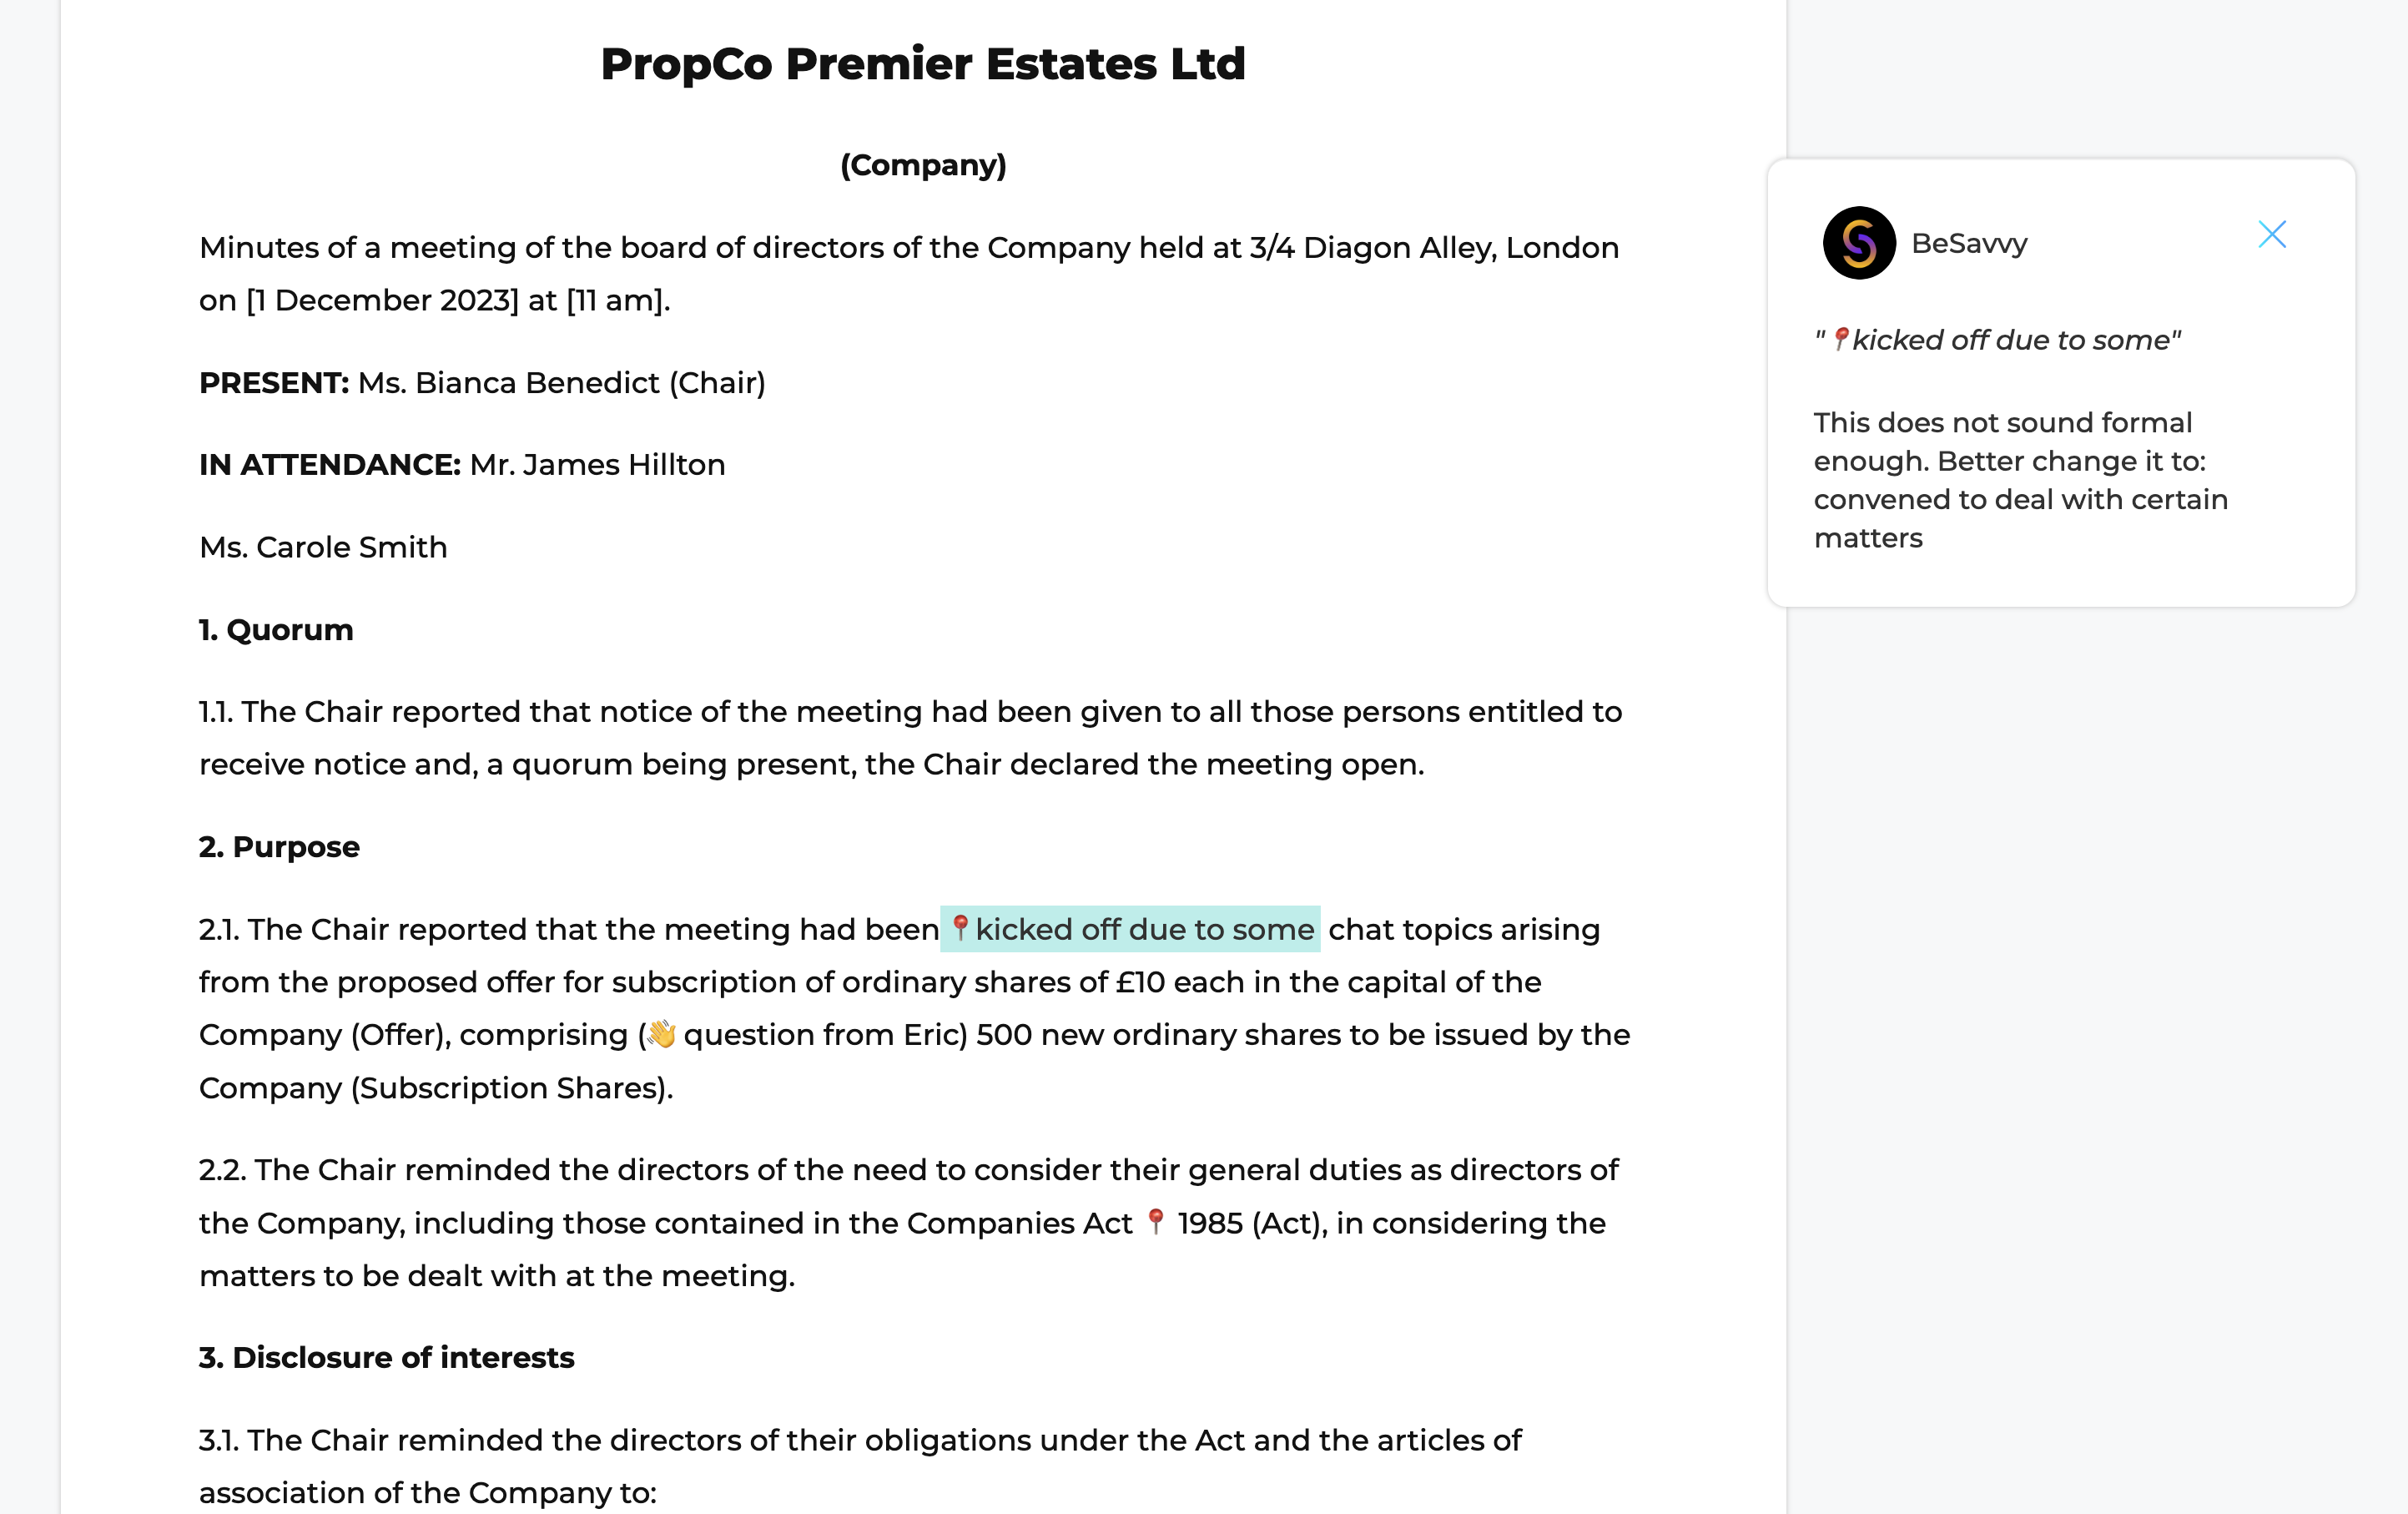
Best for: clause literacy, spotting specific issues in contract language.
How it works:
– You upload or paste a document (or excerpt) into the Editor Block.
– The learner must find and highlight the relevant clause(s) and explain:
- what it says,
- why it matters,
- what the follow-up question is,
- what risk level it is (red/amber/green).
Example tasks
- “Highlight the change of control clause and explain when consent is required.”
- “Find any IP assignment gaps or ‘licence-only’ language that creates ownership risk.”
- “Identify termination triggers and how they affect deal certainty.”
What you’re training
- Close reading
- Translating legal text into plain English
- Distinguishing “issue exists” vs “issue is material”
Element C: Reporting the results (written and/or oral)
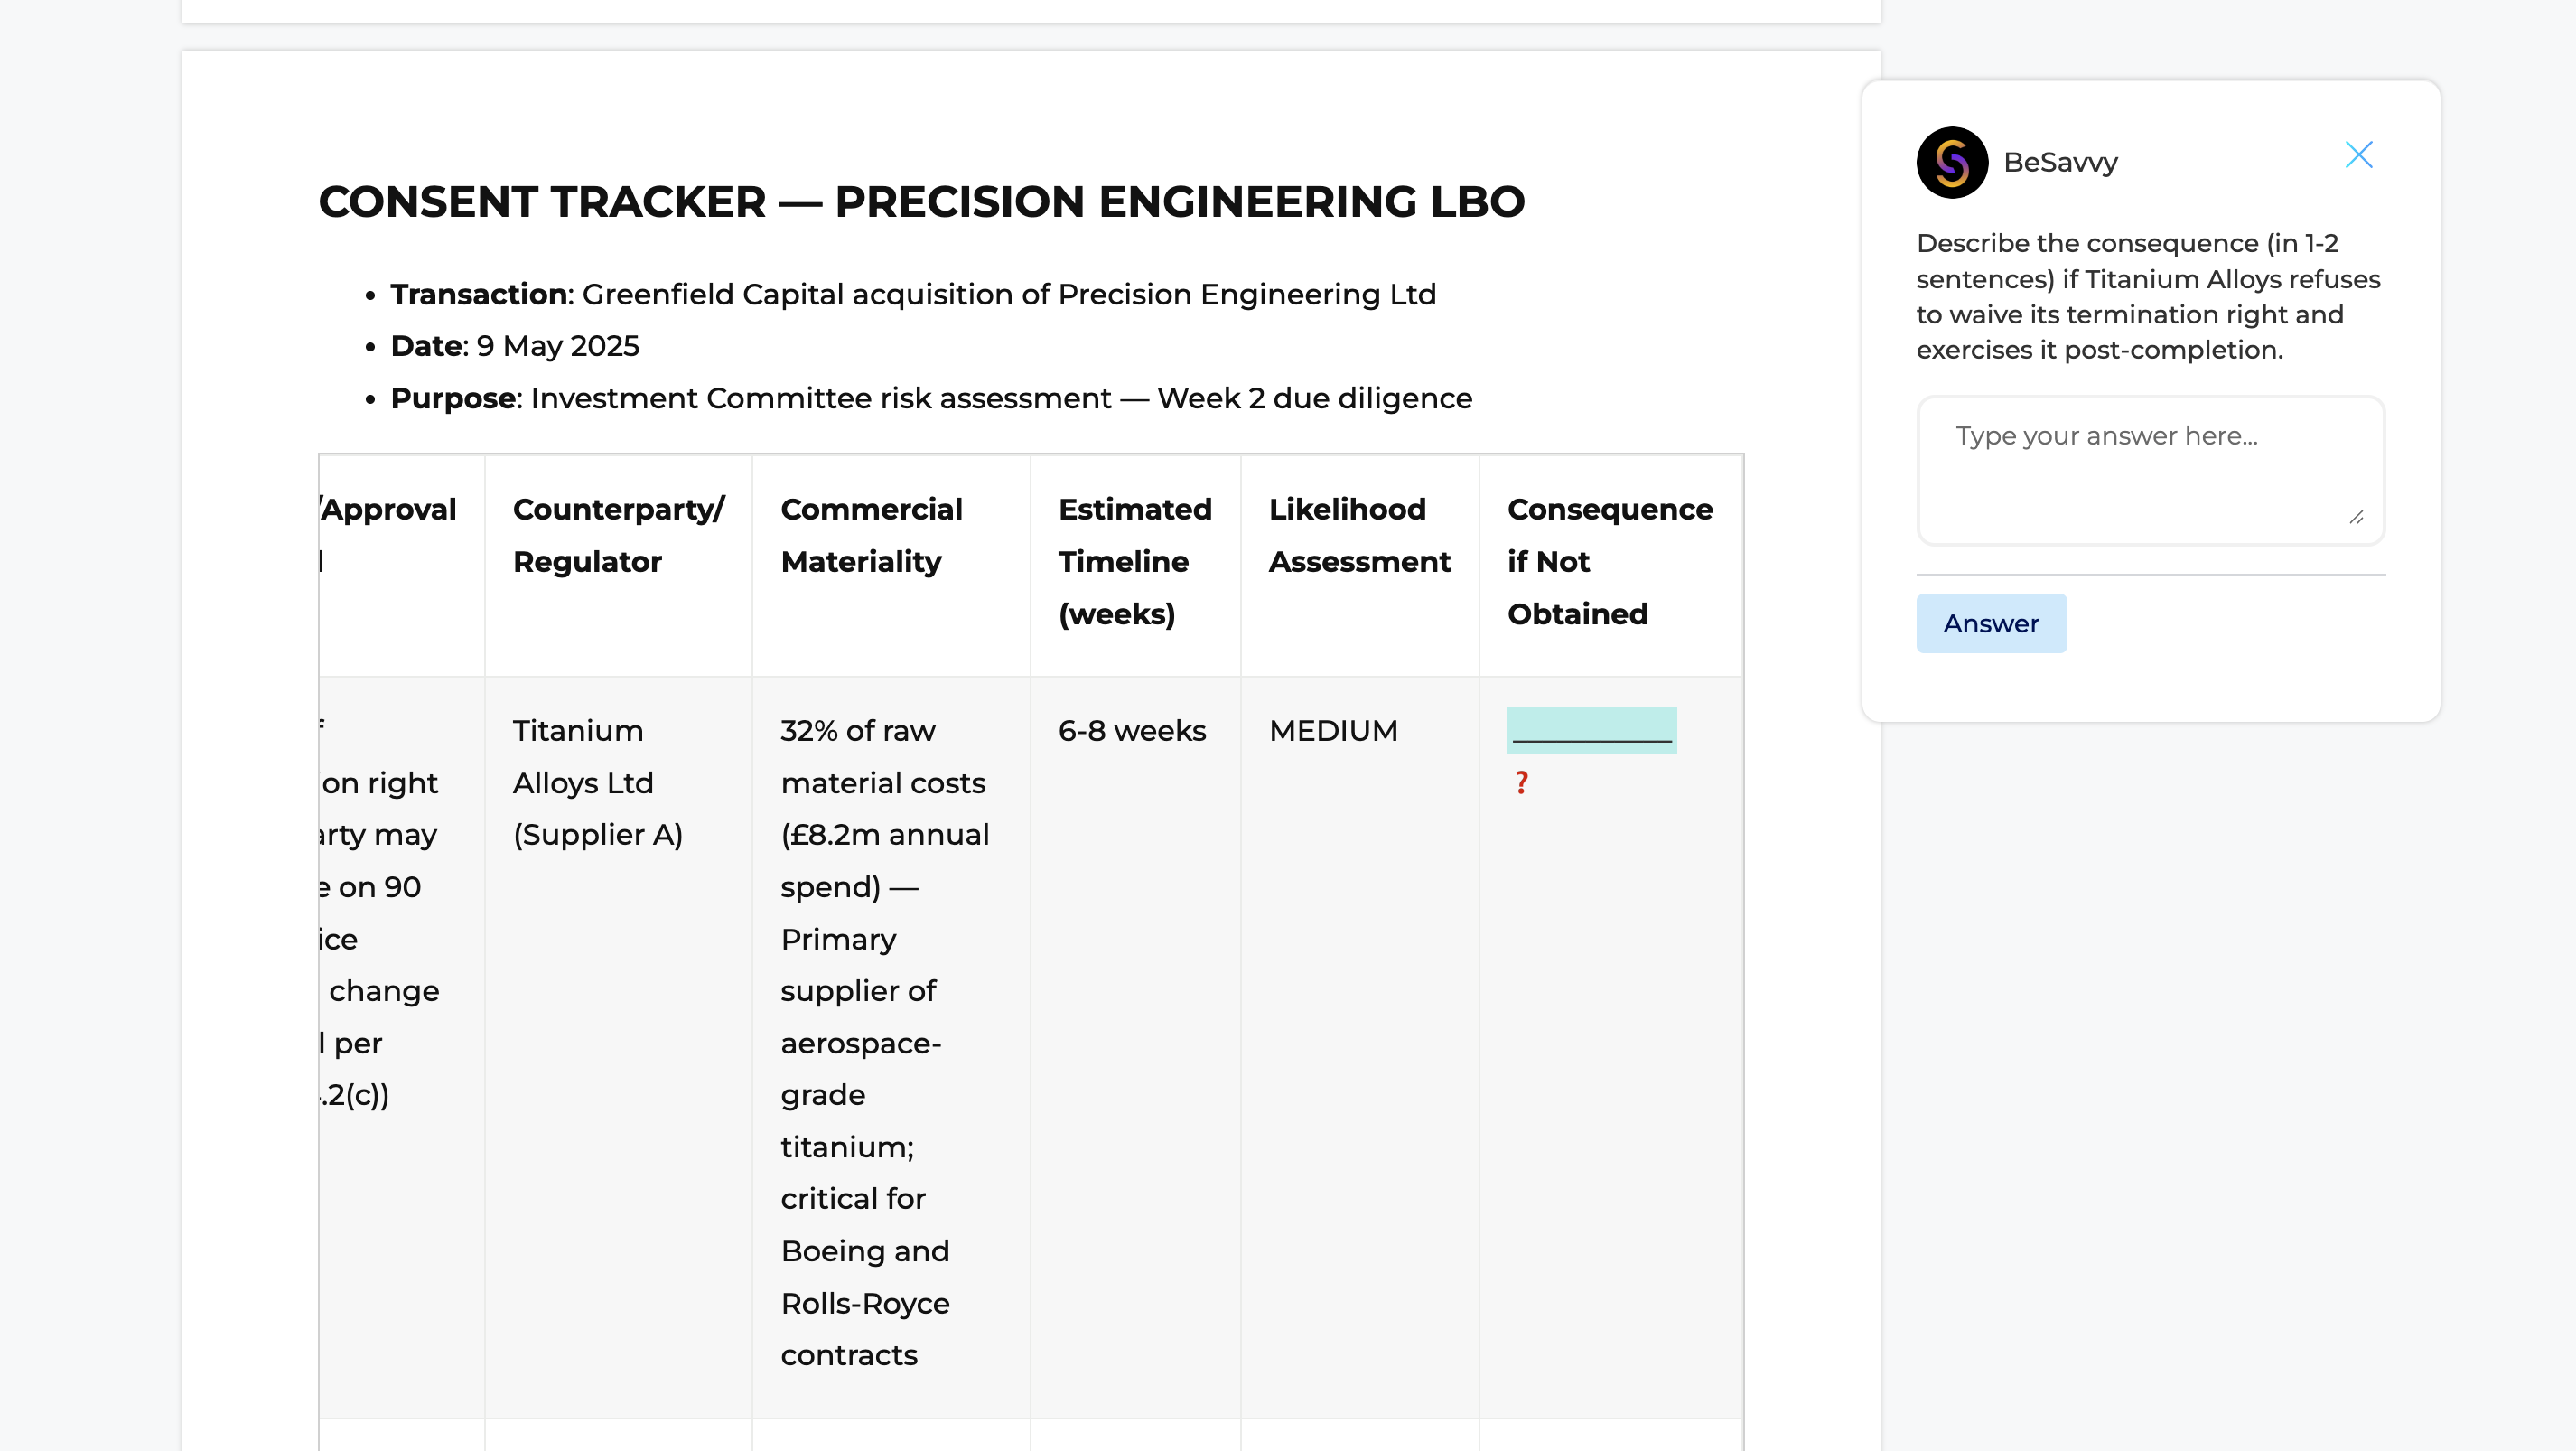
The final module is where the simulation becomes “real work”: the learner must communicate findings clearly and in the right format.
Common reporting formats you can simulate
- Red flag summary (short, partner-friendly) – Draft Block
- Issues list (structured table style) – Editor Block
- Email update to supervising associate – Draft Block
- Client-facing note (careful tone, clear recommendations) – Draft Block
- Oral update (stand-up / call with partner or client) – Conversation Block
3) Connect the elements into one coherent simulator
Once you have built Elements A–C as standalone blocks, connect them into a single end-to-end workflow so the learner experiences a realistic “matter” rather than three disconnected exercises.
The key design principle is continuity: the output of each element should become the input for the next element.
Recommended end-to-end flow:
Element A (Case Study): build the search plan
- The learner works through the scenario and mentor-led guiding questions.
- They finish with a hypothesis list / search plan (typically 3–7 bullets): the risks they expect to find, what would trigger them, and where they would look.
Element B (Search and/or Editor): execute the review against that plan
- The learner uses their search plan to prioritise documents and clauses.
- If you use the Search block, the learner selects the documents that are most likely to confirm or disprove their hypotheses (triage and prioritisation).
- If you use the Editor block, the learner flags the relevant clauses, explains their meaning, and assigns a risk level (close reading and issue articulation).
- The output here should be structured working notes: flagged clauses, risk ratings, and follow-up questions.
Element C (Draft / Editor / Conversation): report the results
The learner converts their notes into a deliverable that matches real practice:
- Red flag summary (Draft block)
- Issues list (Editor block, table-style)
- Email update (Draft block)
- Client note (Draft block)
- Oral update (Conversation block)
The learner should be assessed not only on spotting issues, but on prioritisation, clarity, and actionability (what the team should do next).
Make the handoffs explicit (so it feels like real work)
To reinforce continuity, include short “handoff” instructions between elements, for example:
- “Use your hypothesis list from Element A to decide which documents to review first.”
- “Your flagged clauses and follow-up questions from Element B will be the basis of your red flag summary in Element C.”
Optional final step (high value): close the loop
Add a short mentor debrief after reporting: the mentor challenges one or two judgement calls (“Why is this red, not amber?”), checks whether key items were missed, and confirms what a supervising associate would do next. This makes the simulator feel complete and reinforces the learning objectives.
4) Practical design principles that make simulations work
- Keep documents realistic, but not overwhelming. Start with 6–12 documents (or excerpts). Add complexity later.
- Train one decision per step. Each task should force a clear judgement call (what matters, why, what next).
- Use consistent labels. For example: Red / Amber / Green, and always define what each means in your simulation.
- Iterate with real users. You will see exactly where learners get stuck – and that’s where your best training value is.